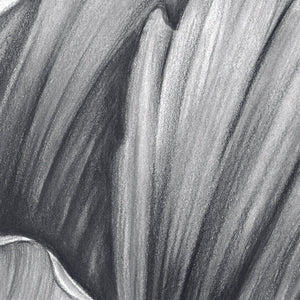
Get to grips with pencils and mark making techniques to create work inspired by David Bomberg.

Step 1
Test your pencils out from hardest to softest. Experiment with hatching, cross-hatching, scribbling and varying pressure.

Step 2
Use a soft pencil (6B) to create strong, geometrically constructed lines, using a ruler. Consider the dynamism of your drawing and vary the pressure of your pencil.

Step 3
Add to your drawing, using some of the harder, light pencils. Work against the edge of a ruler to create sharp edges.

Step 4
Add in deeper tones, giving a stronger sense of light and contrast. Vary the pressure to create rich, dark tones. This approach can be explored using colour.

Step 5
Now try using coloured pencils; experiment with overlaying and blending colours.

Step 6
Map out the framework of your drawing in one colour. Look for angles, edges, shapes and junctions.

Step 7
Start to introduce other colours, concentrating on warmth, coolness and tonality.

Step 8
Introduce Soft Peach, Orange and True Blue along with other colours. Try to work freely and see what happens when colours are layered.


![WN PWC KAREN KLUGLEIN BOTANICAL SET [FRONT]](http://www.winsornewton.com/cdn/shop/files/136444.jpg?crop=center&v=1740654068&width=20)
![WN PWC KAREN KLUGLEIN BOTANICAL SET [OPEN 2]](http://www.winsornewton.com/cdn/shop/files/136447.jpg?crop=center&v=1740654068&width=20)
![WN PWC ESSENTIAL SET [FRONT]](http://www.winsornewton.com/cdn/shop/files/137583.jpg?crop=center&v=1740762356&width=20)
![WN PWC ESSENTIAL SET [OPEN]](http://www.winsornewton.com/cdn/shop/files/137581.jpg?crop=center&v=1740762356&width=20)
![W&N GALERIA CARDBOARD SET 10X12ML [B014096] 884955097809 [FOP]](http://www.winsornewton.com/cdn/shop/files/138855.jpg?crop=center&v=1740761853&width=20)
![W&N GALERIA CARDBOARD SET 10X12ML 884955097809 [OPEN]](http://www.winsornewton.com/cdn/shop/files/138856.jpg?crop=center&v=1740761853&width=20)

![W&N PROMARKER 24PC STUDENT DESIGNER 884955043295 [FRONT]](http://www.winsornewton.com/cdn/shop/files/78674_d4d78a69-7150-4bf4-a504-3cb5304b0f80.jpg?crop=center&v=1721326116&width=20)

![W&N PROFESSIONAL WATER COLOUR TYRIAN PURPLE [SWATCH]](http://www.winsornewton.com/cdn/shop/files/136113.jpg?crop=center&v=1724423390&width=20)
![W&N WINTON OIL COLOUR [COMPOSITE] 37ML TITANIUM WHITE 094376711653](http://www.winsornewton.com/cdn/shop/files/9238_5073745e-fcfe-4fad-aab4-d631b84e4491.jpg?crop=center&v=1721326117&width=20)
![W&N WINTON OIL COLOUR [SPLODGE] TITANIUM WHITE](http://www.winsornewton.com/cdn/shop/files/131754_19b392ee-9bf6-4caf-a2eb-0356ec1c660a.jpg?crop=center&v=1721326118&width=20)